Multispectral to true-color drone imagery
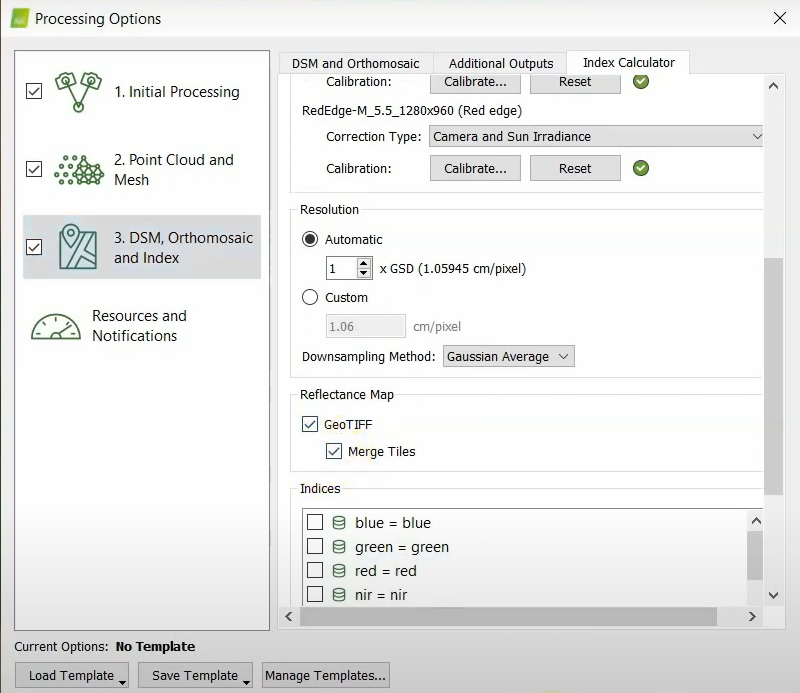
- We will start with a reflectance index map from the multispectral camera. To make sure that is generated by Pix4D, click on the Processing Options , and in the 3. DSM, Orthomosaic, and Index section, make sure that in the “Index Calculator” tab, the box in the Reflectance Map section for “GeoTIFF” and “Merge Tiles” are checked:
- If they weren’t previously checked, re-run just the third step of Processing in Pix4D (in the main page, unselect the boxes for steps 1 and 2, select the box for Step 3, and click Run).
- After processing in Pix4D, navigate to the output directories. By default, this is in Documents/PROJECT_NAME/4_index/index, with sub-directories for each wavelength. We will be interested in the red, green, and blue .tif layers. Ignore or delete any “tiles” folders.
- Drag and drop each layer (red, green, and blue .tif files) into the canvas in QGIS
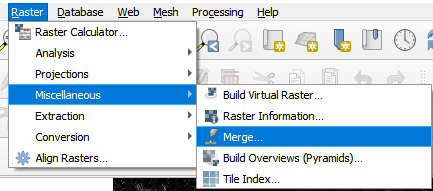
- On the menu bar at the top of QGIS, click Raster → Miscellaneous → Merge:

- In the new window, click the three dots to the far right of “input layer”. Then select the three layers you just dropped into QGIS
- Check box for “Place each input file into a separate band”
- No need to touch the “Merged” section yet, a temporary output is okay.
- Click “Run”.
- At first, your output will look funky. Check out this view of a pumpkin field, which looks more like a Violet Beauregard field:
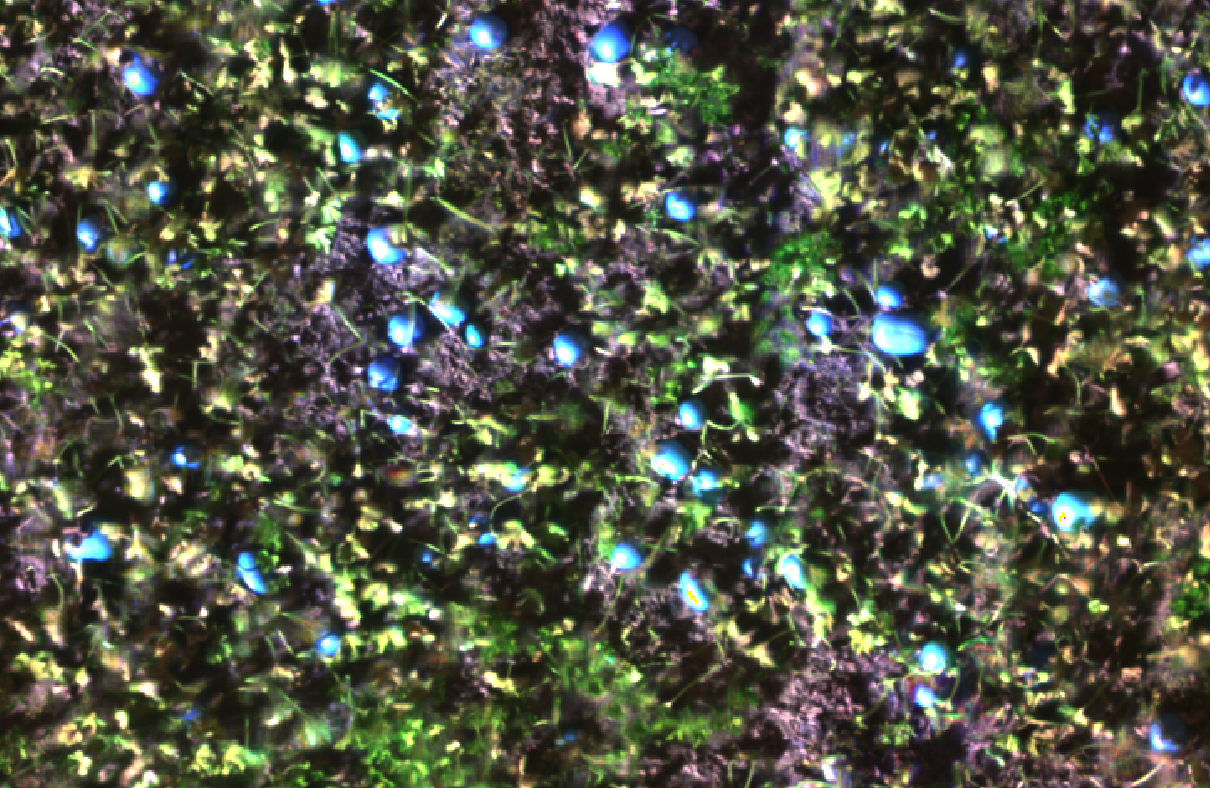
Don’t worry. We will correct this!
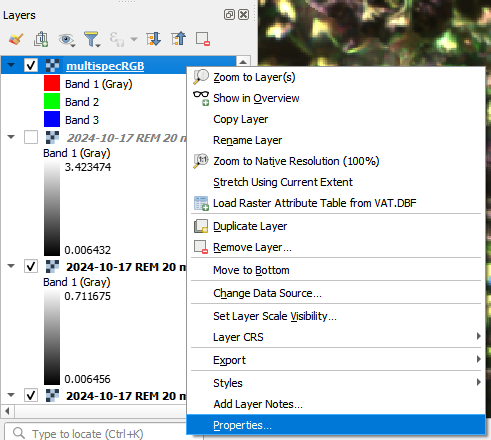
- In the Layers Panel at bottom left, right click the new layer, and click “Properties”
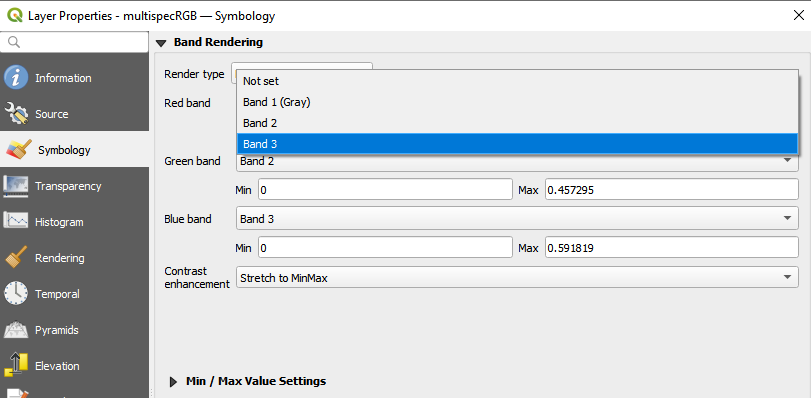
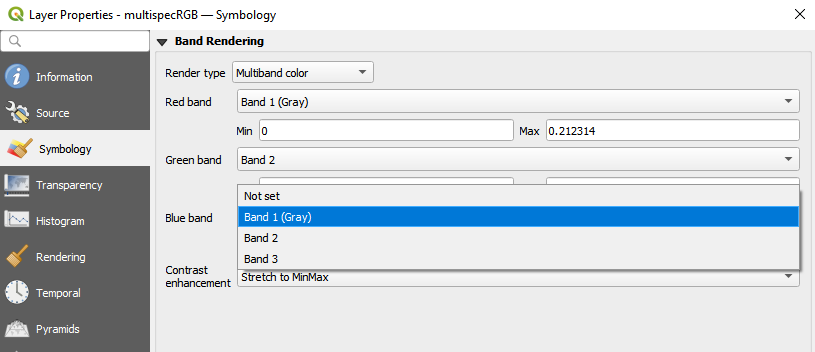
- In the “Symbology” tab at left, select “Band 3” as the Red Band, and “Band 1” as the Blue band:
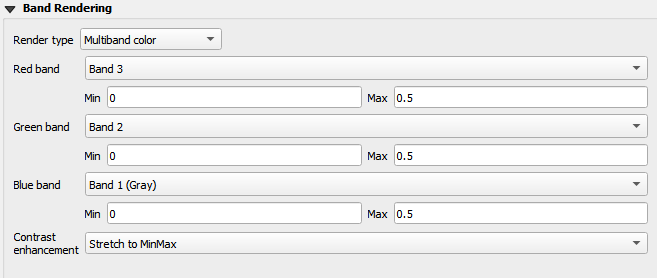
- Make sure the minimum and maximum values are the same for all the wavelengths. For example, make sure they all range from Min = 0 to Max =0.5. Click “Run”
- Image too dark? Reduce the “Max” values for all wavelengths in the properties section. Too bright? Increase it! You can also tinker with them individually, if needed, depending on your purposes.
- Once you are happy with your image, right click it in the Layers Panel, click “Export” → “Save As”
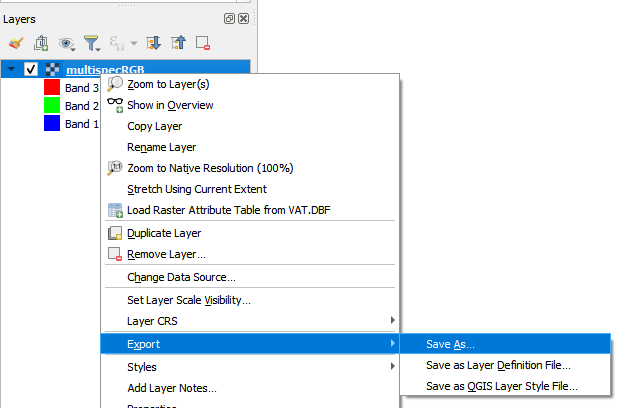
- In the new window, click the three dots to the right of “File name”, then give your new file a location and name.
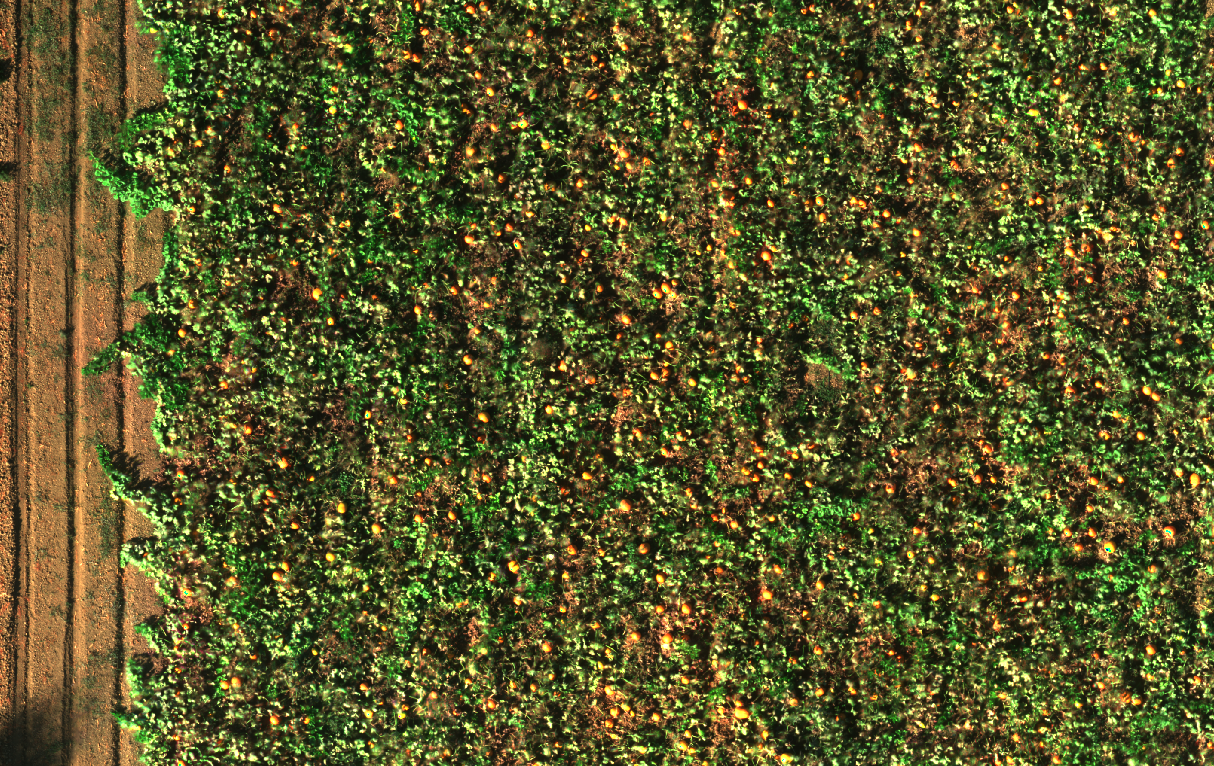
- Voila!